How to use “General Probe Settings”
Tim
Last Update 2 tahun yang lalu
In order to access more RS485 probes, UbiBot has developed the General Probe function, which can be set easily according to the probe communication protocol. At present, it only supports GS1 series v2.0.7 and above firmware. Before using, please make sure the communication protocol of the probe meets the following format.
Send/Inquiry Frame

Receive/Answer Frame

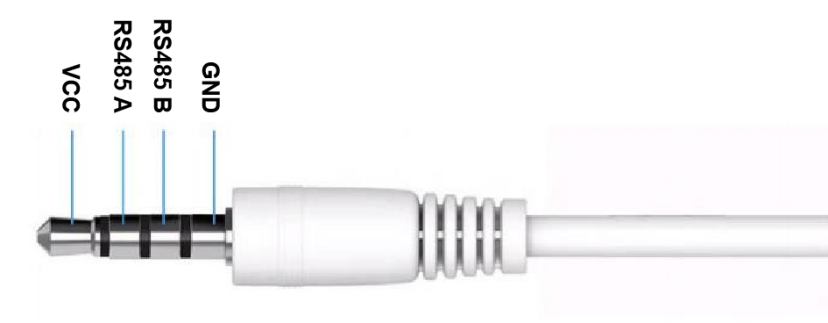
The audio cable wiring sequence for the external probe is shown below. Please confirm the working voltage of the probe to be connected, if the output voltage of the RS485 interface of the device is not satisfied, you need to supply power to the probe separately.
General Probe Settings
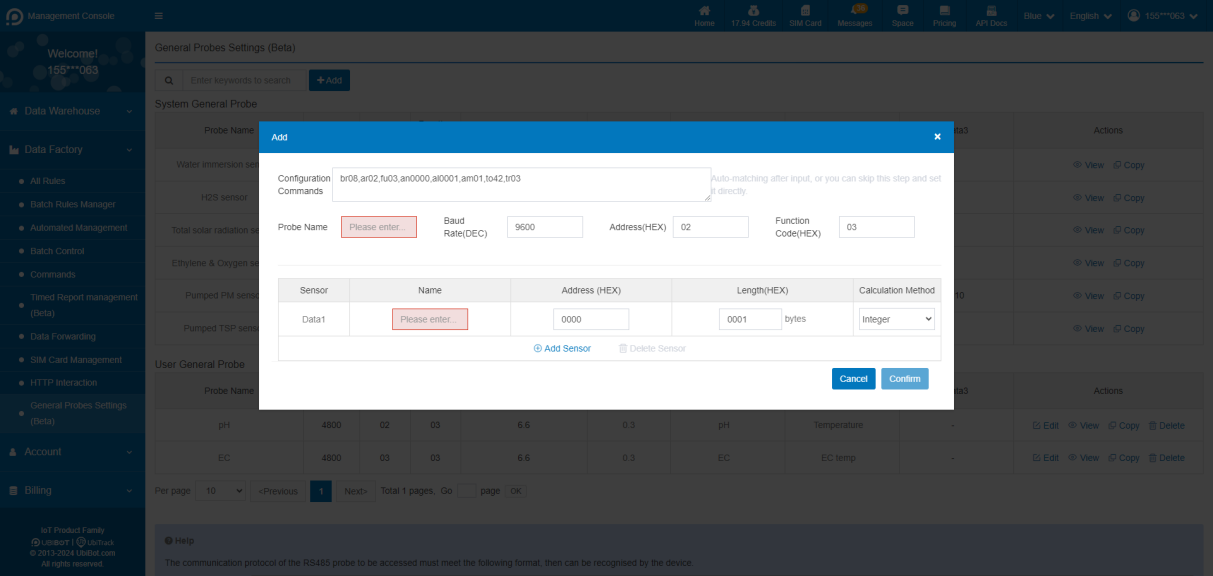
Click [Data Factory] → [General Probe Settings] → [New]. According to the communication protocol of the probe to be connected, fill in the probe name, baud rate, address, function code and sensor information. You can also paste the command string and parse it automatically.
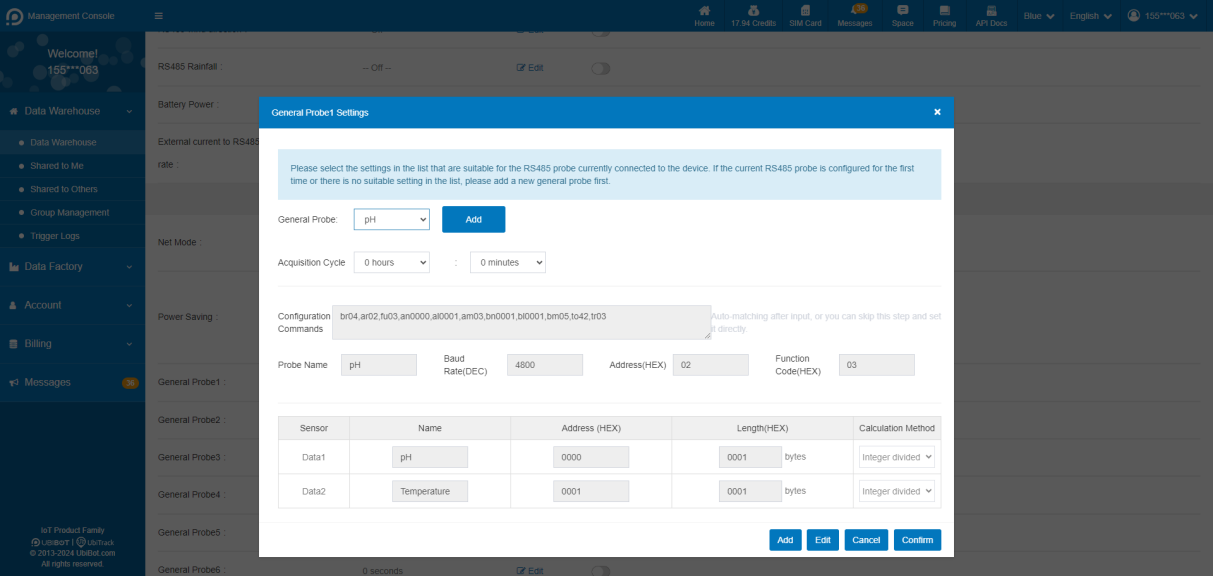
After the setting is completed, enter the device page, click [Settings] → [Data Management]. Scroll down to General Probe and click [Edit]. Then select the corresponding probe and set the acquisition cycle.
Click [Sensor Display Settings], find the corresponding field and click [Edit] to select the sensor data name of the probe setting.
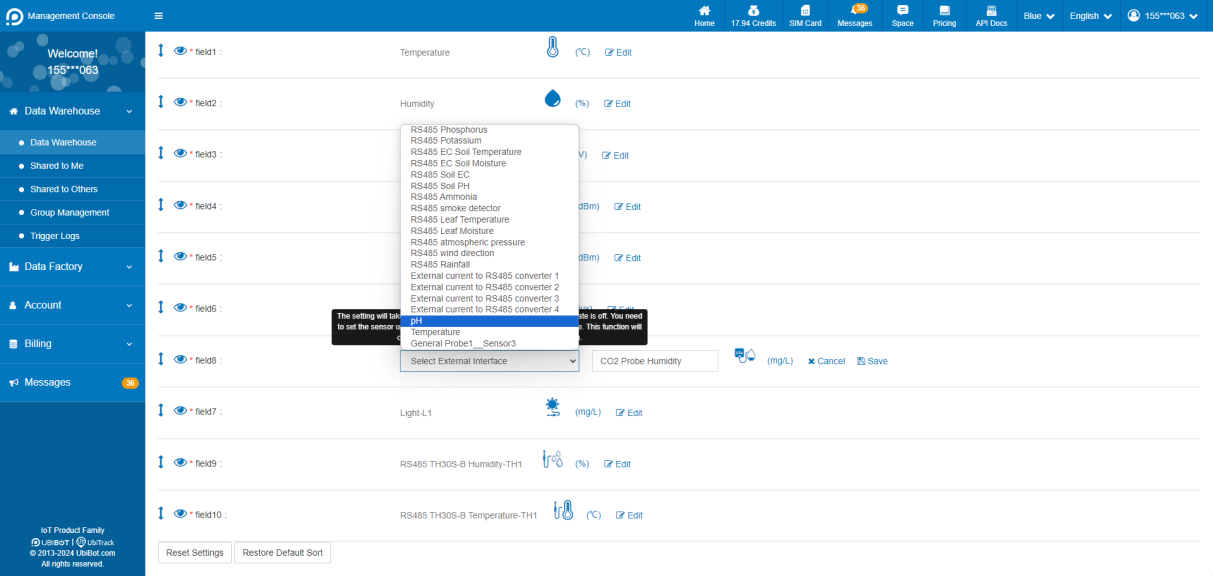
Click the unit as shown in the figure and select the corresponding unit or select “External current to RS485 converter” to customize the unit.
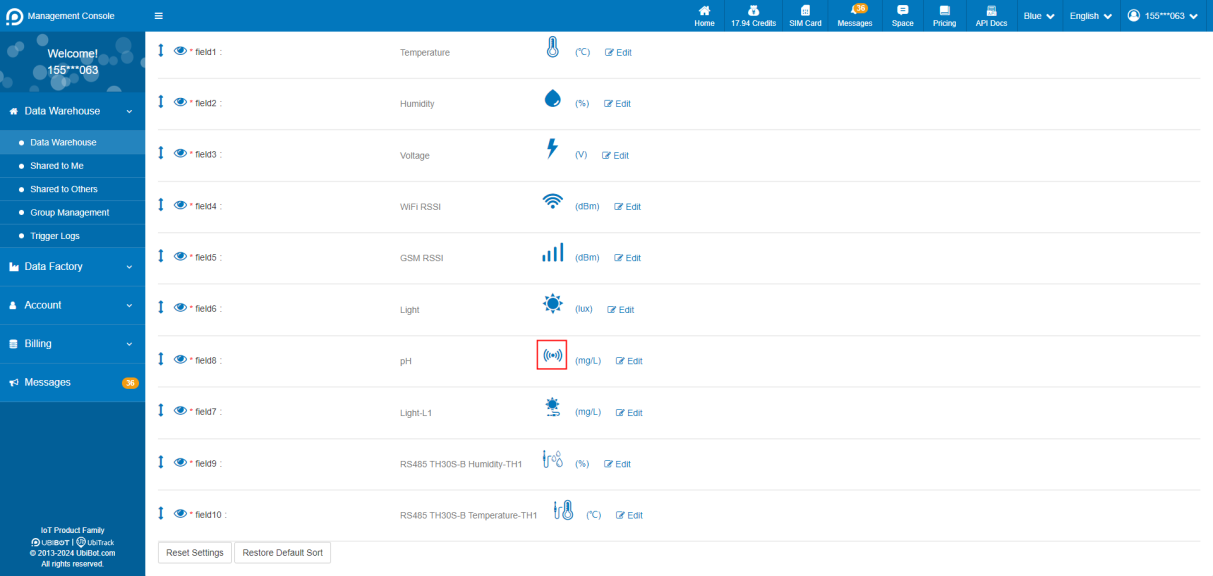
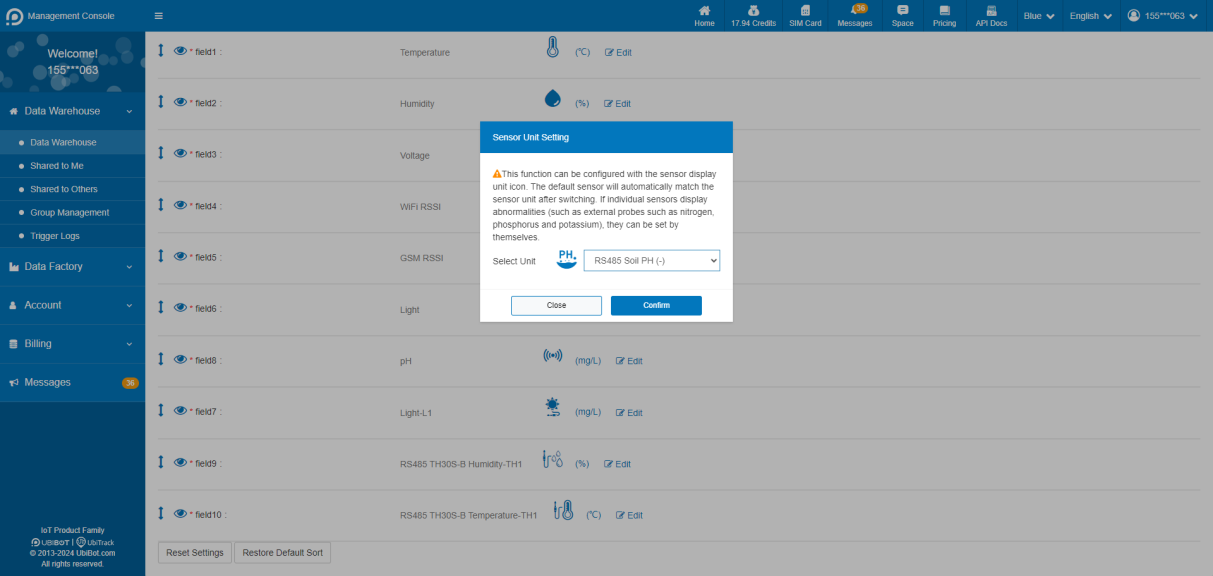
Example
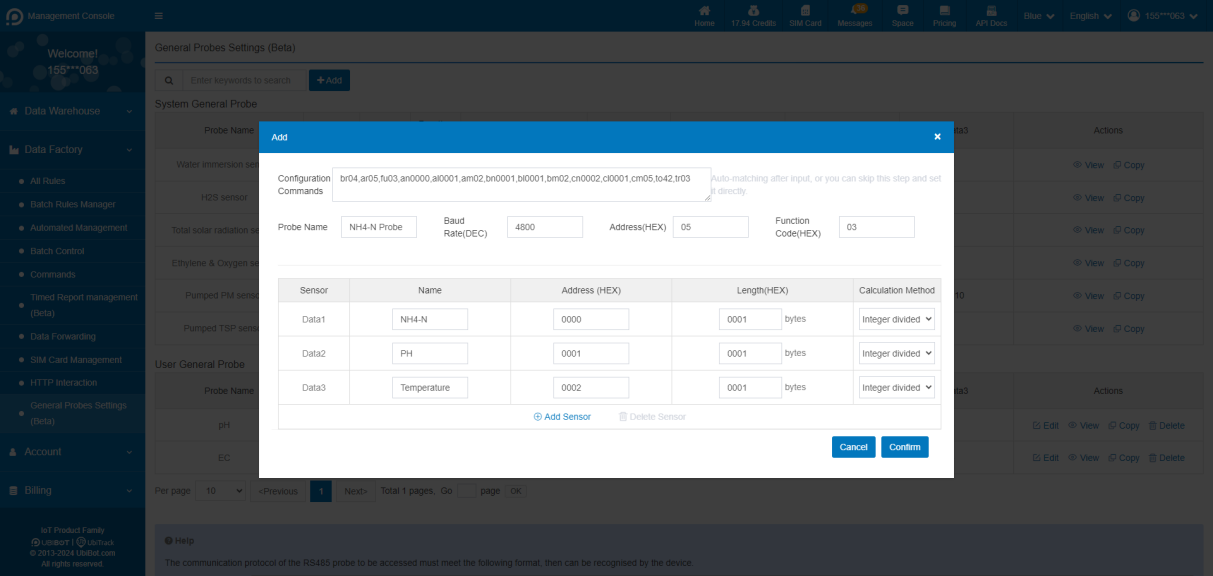
For the external NH4-N sensor, the probe address is 0x05, the baud rate is 4800 bit/s, the function code is 03, and the communication protocol and register address are listed in the table below.

The new probe settings are as follows.
